Getting started with S3

This tutorial will get you started with Amazon's S3. Before you begin, first complete the tutorial on downloading Cloud9 and getting started with EC2. By the end of this tutorial, you will have successful transferred files between HDFS and S3.

To understand what we're doing, let's address the obvious question: why do we need S3? The issue with EC2 is that all your data disappear after you tear down your instances. Puff—just like that, vanished into the bit bucket (sorry, mixing metaphors here). Of course, you can scp data over, and you can scp data back onto your local machine. Unfortunately, not only is this slow, but Amazon charges you for inbound and outbound bandwidth. The solution: enter S3, which is a persistent store that works in conjunction with EC2. There are no charges for transferring data between EC2 and S3. Ah, but here's the catch: S3 charges by the GB per month. Ultimately, they get you one way or another—it's like shipping and handling in those infomercials. Nevertheless, the point is that moving data between EC2 and S3 is quite convenient, and much faster than scp.

Before we begin, a few notes:

  • For writing these instructions I used Hadoop 0.17.0 and Sun's Java JDK 1.6.0_06 on Windows XP (with Cygwin). However, these instructions should be applicable to other operating systems.
  • Note that I'm showing commands as they apply to me: you'll have to change paths, name of machines, etc. as appropriate.
  • In capturing traces of commands running, I use the convention of [...] to indicate places where the output has been truncated.
  • You'll be typing a lot of commands on the command-line. What I've found helpful is to keep a text file open to keep track of the commands I've entered. This is useful for both fixing inevitable typos in command-line arguments and for retracing your steps later.
  • It is best to allocate an uninterrupted block of time to this tutorial, because once you start up an EC2 cluster, you're being charged by time.

Just to give you an overview, here are the steps:

Let's get started!

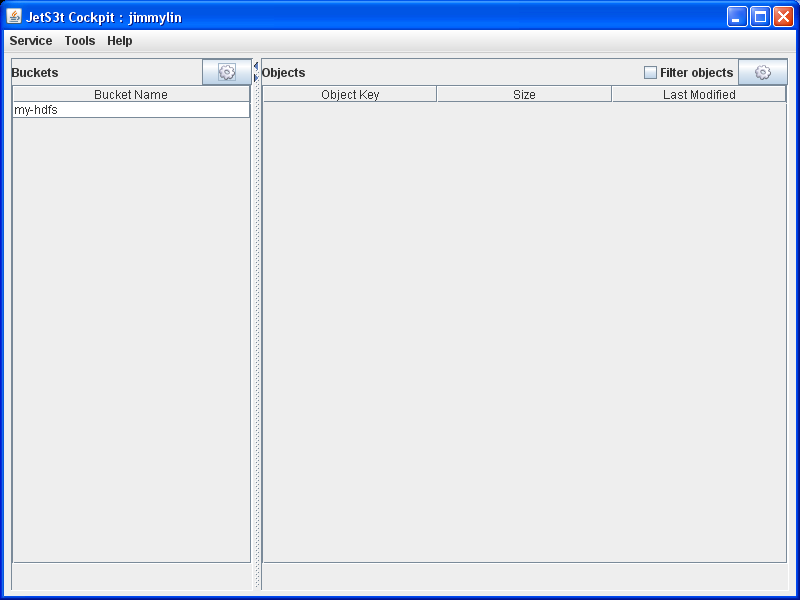
Step 0: Download JetS3t and prep S3

Download JetS3t, which is an open-source Java toolkit and application suite for S3. There are many APIs/clients/front-ends to S3, but this happens to be the one I like the most. After you unpack JetS3t, fire up Cockpit, which is its GUI to S3. Launch scripts should be in bin/. In the "Cockpit Login" you want to go to the "Direct Login" tab. Put in your AWS Access Key and AWS Secret Key, and you should be able to log in.

In the Cockpit interface, you'll see a listing of buckets in the left panel and a list of objects in the right panel. Buckets are just that—places to put stuff. Click on the little icon in the buckets panel and create a new bucket, call it "my-hdfs". Your screen should look something like this:

Screenshot of JetS3t

Step 1: Copying stuff out of HDFS in S3

For a more complete reference, you'll want to consult the Hadoop Wiki page on Amazon S3. But the instructions here should suffice to get you started.

When you start your Hadoop cluser, you'll see something like:

[...]
Started as domU-12-31-39-00-7C-58.compute-1.internal
[...]

Take note of the identifier that begins with domU: that's your private DNS name and you'll need it for later. In case you're curious, it references a Xen DomU guest.

I assume you've completed the tutorial on downloading Cloud9 and getting started with EC2. If so, you should already have the sample data loaded. To verify:

[root@domU-12-31-39-00-7C-58 ~]# hadoop dfs -ls /shared/sample-input
Found 1 items
/shared/sample-input/bible+shakes.nopunc        <r 3>   9068074 [...]

With Hadoop 0.17.0, you may get some warnings about deprecated filesystem name. Don't worry about them.

Now issue the following command to copy data directly from HDFS into S3:

[root@domU-12-31-39-00-7C-58 ~]# hadoop distcp hdfs://domU-XXX:50001/shared/sample-input
  s3://ACCESS_KEY_ID:SECRET_ACCESS_KEY@my-hdfs/shared/sample-input

Remember to replace domU-XXX with your actual internal DNS name (from above). Also replace ACCESS_KEY_ID and SECRET_ACCESS_KEY with their actual values. Note that my-hdfs corresponds to the bucket you set up in the previous step. The execution trace of the above command will look something like:

08/08/05 14:05:18 INFO util.CopyFiles: srcPaths=[hdfs://domU-XXX:50001/shared/sample-input]
08/08/05 14:05:18 INFO util.CopyFiles: destPath=s3://ACCESS_KEY_ID:SECRET_ACCESS_KEY@my-hdfs/shared/sample-input
08/08/05 14:05:22 INFO util.CopyFiles: srcCount=2
08/08/05 14:05:28 INFO mapred.JobClient: Running job: job_200808051356_0001
08/08/05 14:05:29 INFO mapred.JobClient:  map 0% reduce 0%
08/08/05 14:05:52 INFO mapred.JobClient:  map 100% reduce 100%
08/08/05 14:05:53 INFO mapred.JobClient: Job complete: job_200808051356_0001
08/08/05 14:05:53 INFO mapred.JobClient: Counters: 8
08/08/05 14:05:53 INFO mapred.JobClient:   File Systems
08/08/05 14:05:53 INFO mapred.JobClient:     HDFS bytes read=9068352
08/08/05 14:05:53 INFO mapred.JobClient:     S3 bytes written=9068082
08/08/05 14:05:53 INFO mapred.JobClient:   Job Counters
08/08/05 14:05:53 INFO mapred.JobClient:     Launched map tasks=1
08/08/05 14:05:53 INFO mapred.JobClient:   distcp
08/08/05 14:05:53 INFO mapred.JobClient:     Files copied=1
08/08/05 14:05:53 INFO mapred.JobClient:     Bytes copied=9068074
08/08/05 14:05:53 INFO mapred.JobClient:     Bytes expected=9068074
08/08/05 14:05:53 INFO mapred.JobClient:   Map-Reduce Framework
08/08/05 14:05:53 INFO mapred.JobClient:     Map input records=1
08/08/05 14:05:53 INFO mapred.JobClient:     Map input bytes=176

Once again, you may get some warnings about deprecated filesystem name. Don't worry about them.

If you go back to JetS3t and refresh, your screen should look something like this:

Screenshot of JetS3t

Congratulations! You've succesfully stored stuff in S3.

Step 2: Copying stuff into HDFS from S3

Now let's work on the reverse, copying data from S3 directly into HDFS. First, let's blow away data in HDFS. Don't worry, we'll be getting it right back from S3!

[root@domU-12-31-39-00-7C-58 ~]# hadoop dfs -rmr /shared
Deleted /shared

The command is basically the same as before, except the arguments are reversed now:

[root@domU-12-31-39-00-7C-58 ~]# hadoop distcp s3://ACCESS_KEY_ID:SECRET_ACCESS_KEY@my-hdfs/shared/sample-input 
  hdfs://domU-XXX.compute-1.internal:50001/shared/sample-input

Remember to replace domU-XXX with your actual internal DNS name; similarly, replace ACCESS_KEY_ID and SECRET_ACCESS_KEY with their actual values. The execution trace of the above command will look something like:

08/08/05 14:11:23 INFO util.CopyFiles: srcPaths=[s3://ACCESS_KEY_ID:SECRET_ACCESS_KEY@my-hdfs/shared/sample-input]
08/08/05 14:11:23 INFO util.CopyFiles: destPath=hdfs://domU-XXX:50001/shared/sample-input
08/08/05 14:11:28 INFO mapred.JobClient: Running job: job_200808051356_0002
08/08/05 14:11:29 INFO mapred.JobClient:  map 0% reduce 0%
08/08/05 14:11:36 INFO mapred.JobClient:  map 100% reduce 100%
08/08/05 14:11:37 INFO mapred.JobClient: Job complete: job_200808051356_0002
08/08/05 14:11:38 INFO mapred.JobClient: Counters: 9
08/08/05 14:11:38 INFO mapred.JobClient:   File Systems
08/08/05 14:11:38 INFO mapred.JobClient:     HDFS bytes read=284
08/08/05 14:11:38 INFO mapred.JobClient:     HDFS bytes written=9068082
08/08/05 14:11:38 INFO mapred.JobClient:     S3 bytes read=9068074
08/08/05 14:11:38 INFO mapred.JobClient:   Job Counters
08/08/05 14:11:38 INFO mapred.JobClient:     Launched map tasks=1
08/08/05 14:11:38 INFO mapred.JobClient:   distcp
08/08/05 14:11:38 INFO mapred.JobClient:     Files copied=1
08/08/05 14:11:38 INFO mapred.JobClient:     Bytes copied=9068074
08/08/05 14:11:38 INFO mapred.JobClient:     Bytes expected=9068074
08/08/05 14:11:38 INFO mapred.JobClient:   Map-Reduce Framework
08/08/05 14:11:38 INFO mapred.JobClient:     Map input records=1
08/08/05 14:11:38 INFO mapred.JobClient:     Map input bytes=182

You can confirm that the data is indeed back in HDFS:

[root@domU-12-31-39-00-7C-58 ~]# hadoop dfs -ls /shared/sample-input
Found 1 items
/shared/sample-input/bible+shakes.nopunc        <r 3> [...]

And that's it! Remember to clean up when you are done, i.e., tear down your cluster!

Postscript

We've now gone through all steps in the typical development cycle with Hadoop on EC2/S3. Putting everything together, a typical hacking session might look like:

  • Start Hadoop cluster on EC2.
  • Copy data from S3 in HDFS.
  • Do development.
  • Copy data you wish to save from HDFS back into S3.
  • Tear down cluster.

Of course, there are many variations on a theme... but my tutorials should represent a good start. Have fun computing in the clouds!